
When it comes to flexographic printing, consistency is king—and color consistency in particular separates good printers from great ones. That’s where densitometers step into the spotlight. These essential tools are the unsung heroes of every print room, working behind the scenes to keep ink density under control, job after job.
Whether you’re running short runs on film or long jobs on corrugated board, understanding and using densitometers properly can transform your operation from reactive to proactive. So, let’s break it all down—from what densitometers actually do to how to use them like a true flexo pro.
What Are Densitometers?
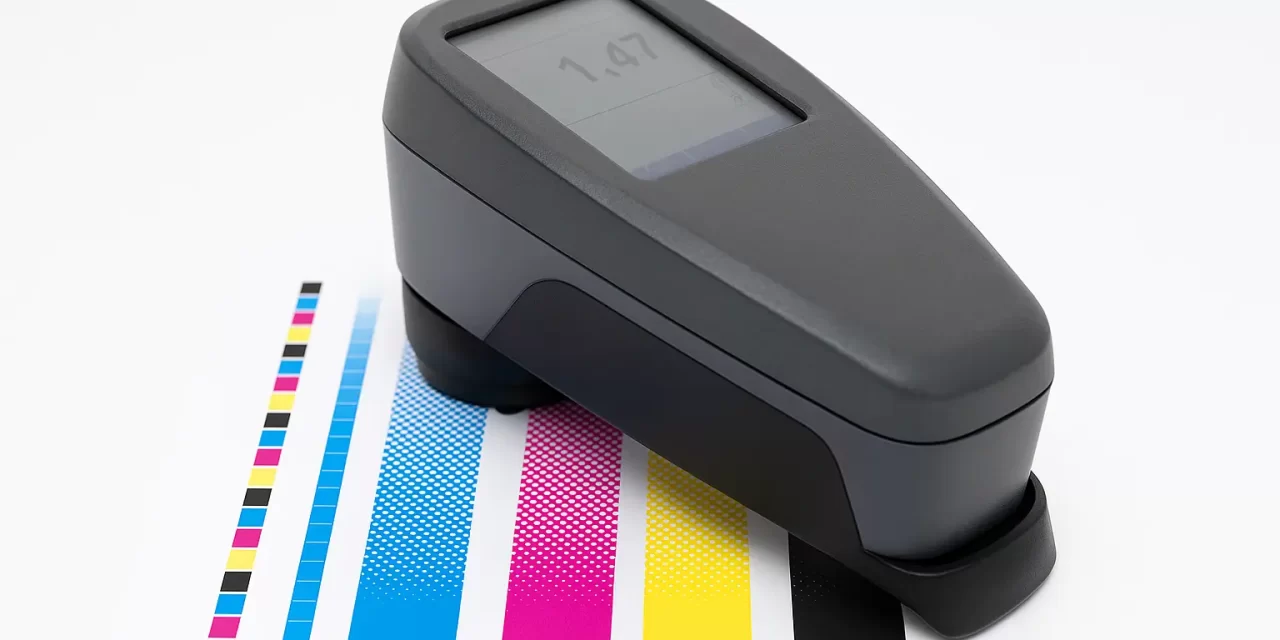
A densitometer is a device that measures the optical density of printed ink. In simpler terms, it tells you how much light is absorbed by a printed area. Unlike spectrophotometers (which analyze color values), densitometers are focused on how much ink is on the substrate—helping you monitor print contrast, dot gain, trapping, and overall ink film thickness.
There are two main types:
- Reflection Densitometers: Measure ink on opaque substrates like paper or board.
- Transmission Densitometers: Measure ink on transparent substrates like film.
In flexo, reflection densitometers are the most common, especially for controlling solid ink density and ensuring consistency throughout a run.
Why Ink Density Matters in Flexographic Printing
Before diving deeper into densitometers, let’s be clear about why ink density control is vital in the first place.
When ink film thickness varies, so does color intensity. Even if your ink formulation is spot-on, an uneven or incorrect ink laydown can:
- Alter color vibrancy
- Affect halftone reproduction
- Cause shifts in registration
- Lead to costly reprints or color re-approvals
By measuring ink density, you gain control over one of the most critical and volatile variables in the flexo process. It helps you make small adjustments before they become big problems.
How Densitometers Work
Densitometers work on the principle of light absorption. A beam of light is directed onto a printed area, and the amount of reflected (or transmitted) light is measured.
The device then converts this into a numerical density value, which you can use to assess:
- Solid ink density (SID): Indicates how much ink is being laid down
- Dot area: Measures dot gain or loss
- Print contrast: Evaluates image sharpness and highlight clarity
- Trapping: Analyzes how well one color layer adheres to another
Each of these metrics plays a role in achieving accurate, repeatable color output.
Common Densitometer Readings You Should Know
Here’s a cheat sheet of densitometer values and what they tell you:
| Measurement | Purpose | Ideal Range |
|---|---|---|
| SID | Ink film thickness on solid areas | Cyan: 1.30–1.50, Magenta: 1.35–1.55, Yellow: 0.90–1.10, Black: 1.60–1.80 |
| Dot Gain | Measures how much halftone dots grow | 12–22% in midtones is typical |
| Print Contrast | Evaluates tonal range | 40–60% (higher means better shadow detail) |
| Trap (%) | Measures how well second color prints on first | 60–90%, depending on ink and substrate |
By monitoring these values, you can fine-tune press settings and optimize print quality in real time.
When to Use a Densitometer on Press
Timing is everything. A densitometer is most valuable when used:
- During press setup to establish baseline densities
- After each color change or ink batch swap
- After anilox or doctor blade changes
- Periodically throughout long runs to monitor stability
- Before approving first article samples
Skipping these checkpoints is like driving blindfolded—you might get lucky, but chances are you’ll crash.
How to Use a Densitometer Correctly
Using a densitometer may seem simple, but precision is key. Here’s a step-by-step approach:
- Calibrate the device. Use the provided calibration tile or strip.
- Ensure clean, flat contact between the measurement head and substrate.
- Measure at the same angle and same location every time.
- Measure solid patches, not image areas. Use control bars for consistency.
- Log all readings and compare them against target densities.
Pro tip: Take multiple readings across the web (left, center, right) to detect uneven ink laydown.
Densitometers vs Spectrophotometers: What’s the Difference?
While both tools measure aspects of printed color, they serve different purposes:
| Tool | Measures | Use Case |
|---|---|---|
| Densitometer | Optical density | Ink film thickness, dot gain |
| Spectrophotometer | Color values (Lab*) | Color accuracy, ΔE differences |
In an ideal world, you’d use both. Densitometers help you manage process control, while spectros ensure color matching.
Top Densitometers for Flexo Pressrooms
Here are some tried-and-true tools for flexographic professionals:
- Techkon DENS: Robust and fast for production environments
- X-Rite 530 & eXact Dens: Widely trusted, easy calibration, solid software
- TQ-ColorQA™ FlexoPro: Combines density and dot area measurements
Choose a model that fits your workflow, budget, and press type. And don’t forget to train your team—even the best tool is useless in untrained hands.
Benefits of Using Densitometers in Flexography
Still wondering if it’s worth the investment? Consider these benefits:
- Reduces startup waste
- Improves run-to-run consistency
- Shortens color approval cycles
- Minimizes client complaints
- Builds trust with brand owners
- Reduces ink consumption via tighter control
In short, densitometers pay for themselves quickly—especially in high-volume, multi-color environments.
Common Pitfalls to Avoid
Even seasoned press operators make these mistakes:
- Measuring on dirty substrates
- Forgetting to calibrate daily
- Taking inconsistent sample points
- Using outdated target densities
- Not logging or analyzing data
Fixing these habits can result in an instant jump in print quality and efficiency.
Real-World Example: Densitometers in Action
A mid-sized label printer in Ohio struggled with inconsistent black density on food packaging labels. They added a Techkon DENS to their QC routine.
Results after 2 weeks:
- Black SID stabilized from 1.45 ±0.20 to 1.48 ±0.05
- Press setup time dropped by 12 minutes per job
- Ink usage was reduced by 7%
That’s the power of data-driven decisions—enabled by a densitometer.
Conclusion: Densitometers Are a Must-Have, Not a Nice-to-Have
In flexographic printing, what gets measured gets managed—and densitometers are your first line of defense in color control. They empower operators to maintain ink density, optimize dot reproduction, and eliminate costly surprises.
Think of your densitometer as a digital ink whisperer—constantly guiding your press toward peak performance. And when used consistently, it ensures every print you deliver meets the gold standard your clients demand.
So if you’re not measuring density yet, now’s the time. Because in flexo, consistency isn’t optional—it’s the whole game.

