A used doctor blade gets about two seconds of attention on most flexo lines. Operator pulls it off, glances at it, drops it in the scrap bin, fits a new one. That blade is data, and the bin is the wrong place for it. The wear pattern on the working edge of a spent blade maps directly to the condition of the anilox, the holder, the ink, and the pressure setting that produced it. Reading the edge before you bin it is the cheapest diagnostic routine in the pressroom.
This article walks through the eight wear patterns that turn up most often on returned blades, what each one is telling you about the press, and the first thing to check when you see it.
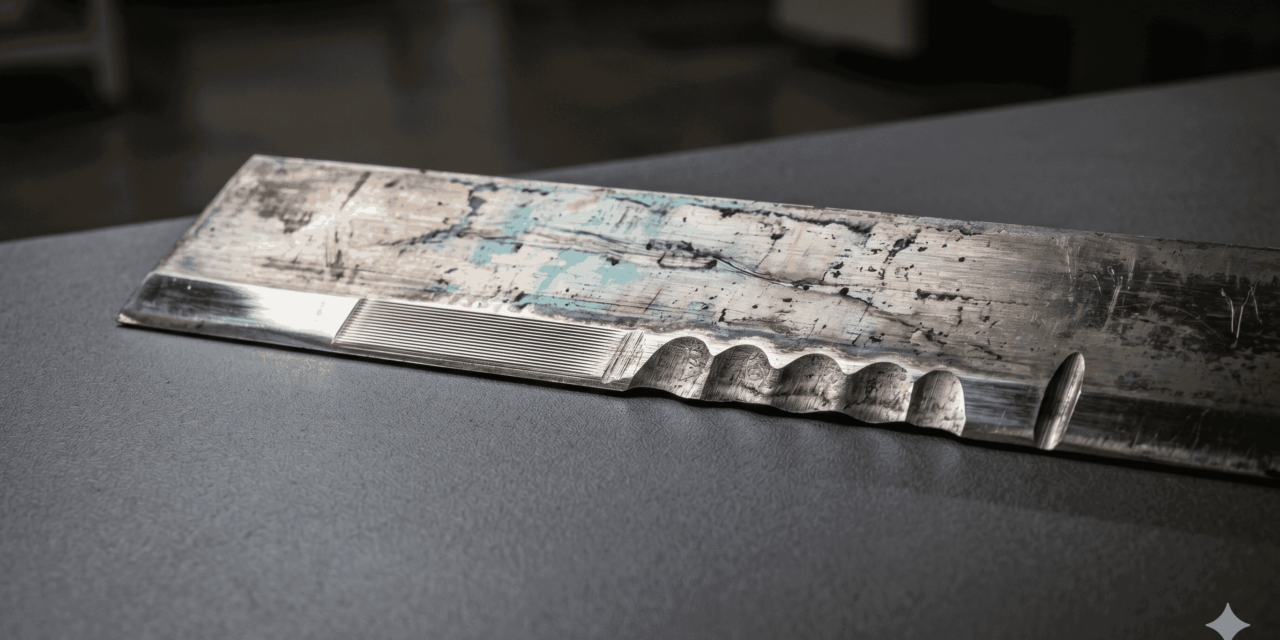
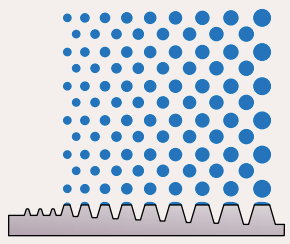
What a Healthy Blade Edge Looks Like
A correctly run carbon steel or stainless lamella blade, typically 0.10 to 0.25 mm thick, should wear evenly across its full working length. After a normal service life, the edge presents a uniform secondary bevel of roughly half the blade thickness, with no shine, no scoring, no scallops, no discolouration beyond the inevitable ink staining.
That baseline matters. Without knowing what good looks like for your blade grade and anilox combination, you cannot read a bad one. Pull one blade from a known stable job, photograph the edge under raking light, and keep it as the reference image in the pressroom.
[insert image: side-by-side macro photographs of a new blade edge, a normally worn blade edge after full life, and a labelled callout of the secondary bevel]
The Eight Patterns and What They Mean
Each pattern below maps to a specific press condition. The table summarises the diagnosis; the sections after expand on the patterns that need more than a line.
| Wear Pattern on the Edge | Likely Press Condition | First Thing to Check |
| Even, uniform secondary bevel | Baseline. Correct pressure, alignment, materials | Reference photograph only |
| Polished or mirrored band | Blade pressure too high, edge hydroplaning on ink film | Blade-to-anilox line load and chamber pressure |
| Scalloped or wavy edge | Chatter from vibration, loose holder, or worn anilox | Blade holder clamping, anilox surface |
| Heavy linear scoring along the edge | Hard particles in the ink loop | Ink filtration, ink age, pigment dispersion |
| Single deep groove at one point | One contaminant trapped at that position | Anilox at that axial position, blade installation debris |
| Asymmetric wear, one end heavier | Blade holder out of parallel with anilox axis | Holder alignment, anilox bearing wear |
| Burnt, blackened, or melted edge | Blade ran dry, no ink lubrication | Ink feed sequence, low ink alarms, startup procedure |
| Edge unworn but discoloured or softened | Chemistry incompatibility, solvent attack | Blade material vs ink chemistry and cleaner |
| Curled or rolled-over edge | Pressure far too high, or blade too soft for the duty | Pressure setting, blade material grade |
| Premature wear, full life never reached | Blade material or thickness mismatched to anilox | Anilox LPI, ceramic vs chrome, blade grade selection |
Polished or Mirrored Band
A bright, reflective strip along the working edge is the classic sign of hydroplaning. The blade is pressed so hard against the anilox that a microscopic ink film acts as a lubricant, and the edge stops cutting and starts skating. The visible symptoms on the web are dirty print, halo around dots, and rising ink density that operators often chase with ink-side adjustments. The problem is mechanical.
Drop the blade load before you change anything else. On chambered systems, check chamber pressure against specification. A doctor blade does not need to be hammered into the anilox to clean it; the cell wall does most of the work.
Scalloped or Wavy Edge
Visible scallops along the working edge mean the blade has been vibrating against the anilox. Three causes account for almost all cases:
- The blade holder is worn, loose, or has lost clamping force across its length
- The anilox itself has localised wear, damage, or out-of-round running
- The blade is too thick or too stiff for the running speed and is excited at its natural frequency
Check the holder first. A holder that no longer clamps the full length of the blade evenly will produce a scalloped pattern even with a perfect anilox.
Heavy Linear Scoring
Multiple parallel scratches running with the blade length point to hard particulate contamination in the ink loop. The usual culprits are dried ink skin from the day tank, pigment agglomerates from poorly dispersed ink, plate debris carried back through the chamber, or grit from the cleaning cycle.
Linear scoring also damages the anilox. Every score line on the blade is a candidate score line on the cell walls, which is far more expensive to fix. Treat scored blades as a filtration alarm, not as a blade quality problem.
Asymmetric Wear
If the operator side of the blade has worn noticeably more than the drive side (or vice versa), the holder is not parallel to the anilox axis. The fix is mechanical alignment, not a blade change. Asymmetric wear left unaddressed will pull the anilox into a tapered wear pattern over months, which is a vastly more expensive correction.
Burnt or Melted Edge
A blackened, scorched, or in extreme cases melted edge indicates the blade ran dry. Without ink in the chamber, the contact is steel on ceramic or polymer on ceramic with no lubrication, and the friction temperature climbs fast. The most common cause is sequence error at startup, where the press began rotating before ink was flowing.
Polymer blades are particularly vulnerable here; the melting point of a polyethylene composite blade is in the region of 130°C, which is well inside the temperature range of an unlubricated edge against a fast-running anilox.
Premature Wear
A blade that has reached scrap thickness in a fraction of its expected life is signalling a material mismatch. The most common mismatch is a soft blade grade against a high line count ceramic anilox. As LPI counts climb above 1,000, the cell wall edges become more abrasive per unit of blade contact, and softer grades wear away before the job finishes.
Daetwyler, TKM, Kadant, Allison Systems and Flexo Concepts all publish grade selection guides matched to anilox LPI ranges and ink types. Use them. Picking the cheapest blade grade and accepting short life is almost always a false economy once you cost in changeover time, waste material during re-tension, and the colour shifts that come with running on a worn edge.
How to Build the Reading Habit into the Routine
Reading wear patterns is worth nothing if the blade is binned before anyone looks at it. The routine is short:
- At every blade change, pull the spent blade and lay it flat on a clean surface
- Photograph the working edge under raking light, with the date, press, deck, ink, and job code in the same frame
- Compare against the reference photograph for that blade grade and anilox combination
- Log anything that does not match the baseline
A weekly review of those photographs catches drift before it reaches the printed web. Most pressrooms find at least one alignment, filtration, or holder issue inside the first month of doing this.
Conclusion
The doctor blade is one of the few components on a flexo press that comes off the machine in a condition you can examine in your hands, under good light, at zero cost. Every spent blade carries a record of the conditions it ran against. Reading that record is faster than chasing the same problems through ink, plates, and anilox checks after the fact. Get a reference image of what good looks like for each blade and anilox pairing in the pressroom, train operators to spot the eight patterns above, and the rest of the press will start telling you what it needs before the printed web does.